
 首页完善(前端)
# 05.首页完善(前端)
首页完善(上)
Overview | TanStack Query React Docs (opens new window)
react-query是一个针对 React 应用的状态管理器,可以简化许多任务,例如处理 HTTP 请求状态、在客户端保存数据以防止多次请求、使用 hooks 共享数据等等。
安装
$npm i @tanstack/react-query
1
查询文档Quick Start | TanStack Query React Docs (opens new window)
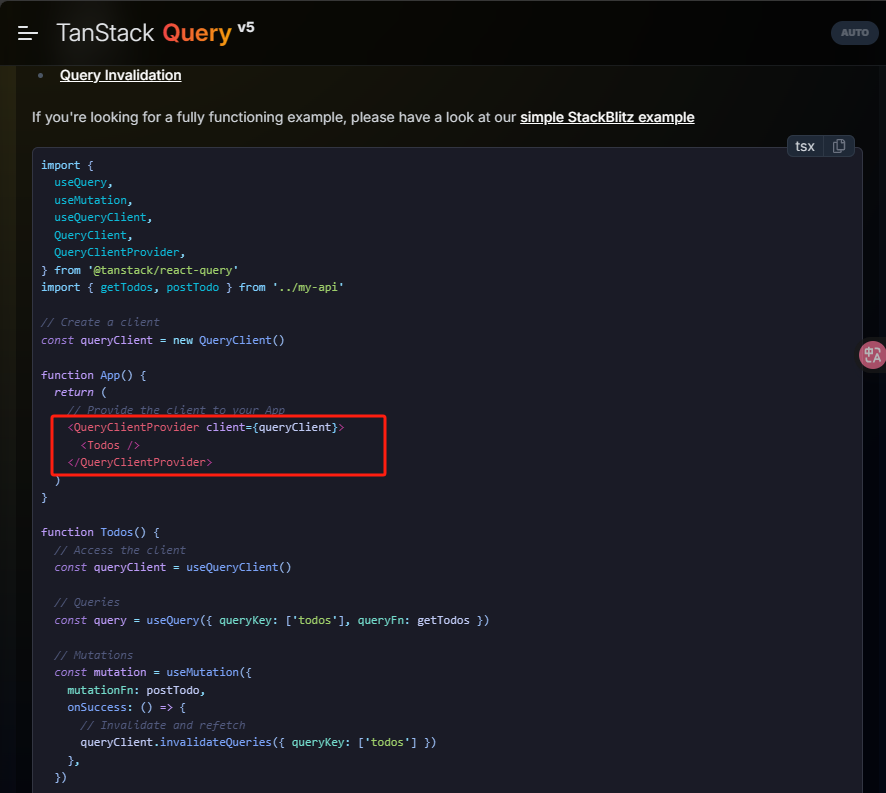
需要定义一个组件 将client包裹起来,QueryClient可用于与缓存交互
# 首页完善
- 定义一个tsx组件,
src/components/QueryClientProvider.tsx,将官方示例复制过来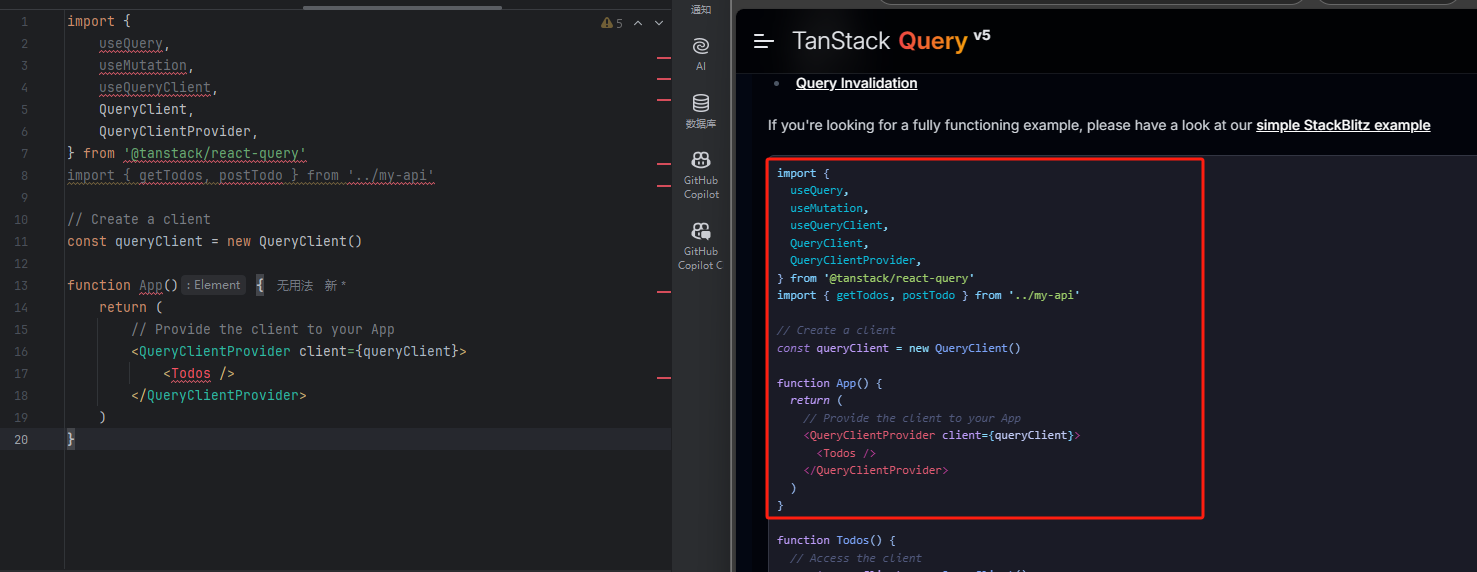
修改代码
'use client'//增加

import {
    useQuery,
    useMutation,
    useQueryClient,
    QueryClient,
    QueryClientProvider,
} from '@tanstack/react-query'

// Create a client
const queryClient = new QueryClient()

function App({children}: {children: React.ReactNode}) {//修改
    return (
        // Provide the client to your App
        //删除Todos改成children
        <QueryClientProvider client={queryClient}>
            {children}
        </QueryClientProvider>
    )
}

export default App //定义App作为可被引用的组件
1
2
3
4
5
6
7
8
9
10
11
12
13
14
15
16
17
18
19
20
21
22
23
24
2
3
4
5
6
7
8
9
10
11
12
13
14
15
16
17
18
19
20
21
22
23
24
- 在
layout.tsx中插入QueryClientProvider组件
  import QueryClientProvider from "@/components/QueryClientProvider";

  .....
  children: React.ReactNode;
}>) {
  return (
  <QueryClientProvider>
  ......
      </html>
  </QueryClientProvider>
1
2
3
4
5
6
7
8
9
10
2
3
4
5
6
7
8
9
10
- 在首页
src/app/page.tsx中使用这个钩子
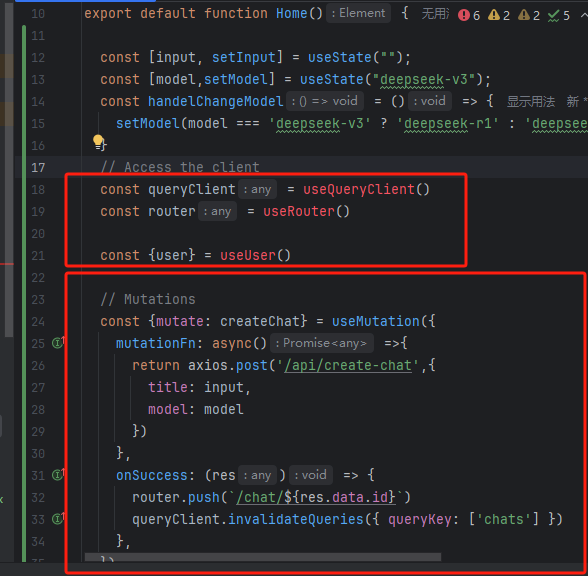
此处需要安装axios库,import上图红色的组件,useUser是clerk提供的登录功能,在后一篇我们会安装它
设置router,成功后跳转创建好的聊天页面
router.push(`/chat/${res.data.id}`)
1
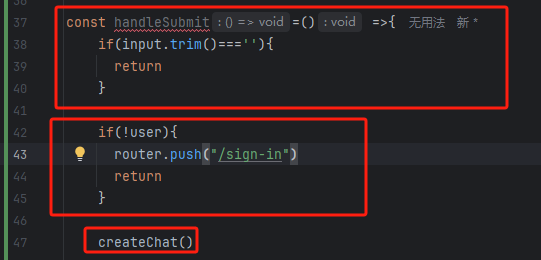
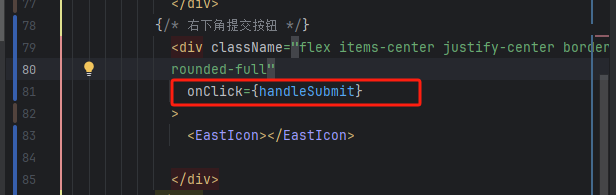
首页的提交按钮此时还没有执行逻辑,添加进去
完整代码
'use client'

import Image from "next/image";
import {useState} from "react";
import EastIcon from '@mui/icons-material/East'
import {useMutation, useQueryClient} from "@tanstack/react-query";
import axios from "axios"
import {useRouter} from "next/router";
import {useUser} from "@clerk/nextjs";


export default function Home() {

  const [input, setInput] = useState("");
  const [model,setModel] = useState("deepseek-v3");
  const handelChangeModel = () => {
    setModel(model === 'deepseek-v3' ? 'deepseek-r1' : 'deepseek-v3');
  }
  // Access the client
  const queryClient = useQueryClient()
  const router = useRouter()

  const {user} = useUser()

  // Mutations
  const {mutate: createChat} = useMutation({
    mutationFn: async() =>{
      return axios.post('/api/create-chat',{
        title: input,
        model: model
      })
    },
    onSuccess: (res) => {
      router.push(`/chat/${res.data.id}`)
      queryClient.invalidateQueries({ queryKey: ['chats'] })
    },
  })

const handleSubmit=() =>{
    if(input.trim()===''){
      return
    }

    if(!user){
      router.push("/sign-in")
      return
    }

    createChat()
}
  return (
    <div className="h-screen flex flex-col items-center">
      <div className="h-1/5"></div>
      <div className="w-1/2">
        <p className="text-bold text-2xl text-center">
          有什么可以帮您的吗
        </p>

        <div className="flex flex-col items-center justify-center mt-4
        shadow-lg border-[1px] border-gray-300 h-32 rounded-lg">
          <textarea
            className="w-full rounded-lg p-3 h-30 focus:outline-none"
            value={input}
            onChange={(e) => setInput(e.target.value)}
            >
          </textarea>
          <div className="flex flex-row items-center justify-between w-full h-12 mb-2">
            <div>
              {/*左下角深度思考按钮*/}
              <div className={`flex flex-row items-center justify-center rounded-lg
              border-[1px] px-2 py-1 ml-2 cursor-pointer ${model === 'deepseek-r1' ?
                  "border-blue-300 bg-blue-200" : "border-gray-300"}`}
                   onClick={handelChangeModel}
              >
                <p className="text-sm">
                  深度思考(R1)
                </p>
              </div>
            </div>
          {/* 右下角提交按钮 */}
            <div className="flex items-center justify-center border-2 mr-4 border-black p-1
            rounded-full"
              onClick={handleSubmit}
            >
              <EastIcon></EastIcon>

            </div>
          </div>

        </div>
      </div>
    </div>
  );
}
1
2
3
4
5
6
7
8
9
10
11
12
13
14
15
16
17
18
19
20
21
22
23
24
25
26
27
28
29
30
31
32
33
34
35
36
37
38
39
40
41
42
43
44
45
46
47
48
49
50
51
52
53
54
55
56
57
58
59
60
61
62
63
64
65
66
67
68
69
70
71
72
73
74
75
76
77
78
79
80
81
82
83
84
85
86
87
88
89
90
91
92
93
94
前端的请求完成了,还需要在后端写相应的逻辑处理
文字写于:广东
更新时间: 2025/4/27 23:24:07
